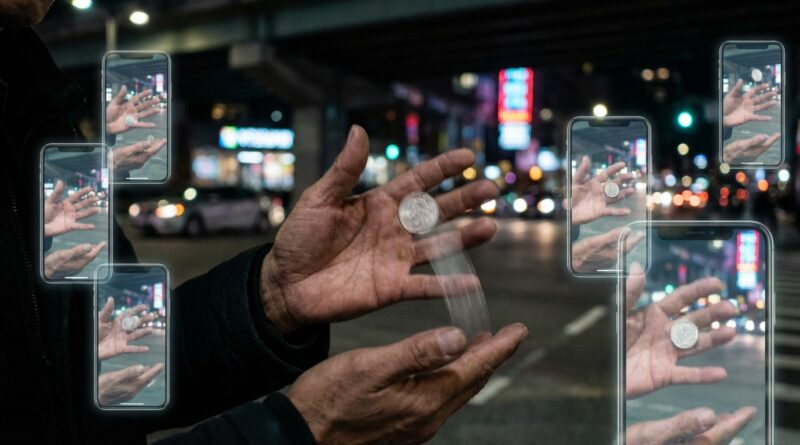
From Slow‑Mo Clips To Real Workers: How To Build ‘Camera‑Proof’ Hand Vanishes That Survive Frame‑By‑Frame Scrutiny
You know the feeling. A vanish kills in real life, then someone films it, scrubs through frame by frame, and suddenly your miracle looks like a clumsy transfer with good lighting. That stings, especially if you perform online or for spectators who treat every trick like a detective case. The truth is, a lot of classic handlings were built to survive human attention, not a phone camera that can pause at the exact wrong moment. So if you want a real camera proof sleight of hand vanish for social media, you have to build for the lens, not just for the live eye. That means fewer “secret moments,” cleaner finger positions, tighter object paths, and vanish structures that still make sense from ugly angles. The good news is you do not need to throw out sleight of hand. You just need to redesign it like a working creator, not a hopeful uploader.
⚡ In a Hurry? Key Takeaways
- A camera-proof vanish is not about speed. It is about removing suspicious frames and making every visible moment look honest.
- Start with one object, one clear display, one justified hand motion, and one clean ending. Complexity usually makes slow-mo worse.
- Test every vanish with your phone at 0.5x and frame scrubbing before posting. If it fails on your own camera, it will fail harder in the comments.
Why good live vanishes often fail on camera
Most vanishes are built on timing. A spectator blinks, shifts focus, or follows your eyes for half a second, and the method slips by. Cameras do not blink. They do not get socially nudged. They do not feel your confidence.
That changes the whole game.
When a vanish falls apart on social media, it is usually because one of three things happened. The object path looked unnatural. The dirty hand was over-protected. Or the vanish happened before the audience believed the object was really where you claimed it was.
People replay clips because they expect a move. Your job is not just to hide the move. Your job is to make replay unhelpful.
What “camera-proof” really means
A camera-proof vanish does not mean literally impossible to analyze. That bar is too high, and honestly not useful. It means the method does not expose itself in the obvious places people check first.
Those places are predictable.
The three tests every vanish must pass
Test 1. The pause test. If someone freezes the video right before and right after the vanish, do both frames look natural?
Test 2. The path test. If someone tracks the object with their eyes, does it travel in a believable way, or does it seem to teleport into finger palm because your hand suddenly changed shape?
Test 3. The bad-angle test. If the phone is slightly low, slightly to the side, or a bit too close, does the handling still read clean?
If your vanish fails any one of those, it is not ready for social posting.
Build the vanish backwards from the exposure points
This is the part many magicians skip. They start with a move they like, then try to shoot around its weaknesses. That works for one clip, maybe two. It is not a real worker.
Start the other way around. Ask where the camera is most likely to catch you. Then remove or soften those moments.
Exposure point 1. The false display
If the object is “shown” in a way no normal person would hold it, viewers smell trouble immediately. Keep displays boring. Boring is your friend. The more casual and repeatable the display, the stronger the vanish.
Exposure point 2. The transfer
This is where most slow-mo deaths happen. Fingers curl too early. The receiving hand arrives too soon. The giving hand stays frozen like it knows it is guilty. A camera loves this stuff.
Fix it by shortening the transfer window. Either make the real work happen before the supposed transfer, or after it. The visible transfer itself should be almost empty.
Exposure point 3. The cleanup
A vanish is not over when the object disappears. It is over when both hands look innocent. Many clips fool people for one second, then die during the cleanup because one hand ducks out of frame or suddenly becomes a fist for no reason.
That is not a vanish problem. That is a routine design problem.
The best structure for a social-media vanish
If you want a camera proof sleight of hand vanish for social media, the strongest structure is usually this:
1. Clean, open display
Show the object in a stable grip. No twitchy proving. No extra turns. Let the audience settle.
2. A justified action
Do something that makes sense even if there were no trick. Adjust your grip. Toss the object from hand to hand. Rub it. Pretend to place it away. The action needs a reason.
3. Secret retention or concealment before the “magic moment”
This is where many creators improve overnight. The real work should often happen before the audience thinks the vanish starts. That gives replay less to bite into.
4. Empty-hand picture
Not just an empty hand. An empty-looking shape. Fingers relaxed. Palm line visible enough to read as open. No weird tension.
5. Balanced ending
Both hands should have a job. One should not look like it is hiding a family secret while the other acts innocent.
Design rules that make vanishes survive slow motion
Rule 1. Use larger motions to hide smaller truths
This sounds backward, but it works. Tiny secret finger actions look huge in close-up video. A broader, justified hand action often covers them better than trying to “do nothing.”
Think of it like this. A small lie inside a natural bigger motion is harder to isolate than a tiny suspicious twitch floating by itself.
Rule 2. Keep finger positions consistent
Nothing screams method like a hand that changes character. If your open hand becomes claw-like only during the critical beat, viewers may not know why, but they know something changed.
Film your vanish with sound off. Watch only the fingers. If the shape shifts at the wrong time, fix that first.
Rule 3. Do not race the camera
Speed fools people less than you think. On social, speed invites replay. Smoothness beats quickness. If your vanish needs a blur to work, it is probably a camera trap waiting to happen.
Rule 4. Build in a moment of conviction before the vanish
The audience needs to feel certain the object is still there. If they are not convinced before the vanish, they will assume the object left earlier. That is exactly what replay hunters are looking for.
Rule 5. End cleaner than you think you need to
The comments section is where half the battle happens. If your ending frame looks generous and fair, people start arguing on your side.
A practical handling blueprint you can try tonight
Without exposing specific methods, here is a working blueprint that fits coins, folded bills, rings, and other small objects.
Phase 1. Honest display
Hold the object at the fingertips in the most ordinary way you can. Pause. One beat. Let the camera register it.
Phase 2. Off-beat preparation
Before the audience thinks anything important is happening, get into whatever condition your method needs. This should look like grip adjustment, not secret loading.
Phase 3. Visible action with almost no secret content
This is the key. The apparent transfer, rub, toss, or take should contain as little method as possible. If the move lives here, slow-mo will find it.
Phase 4. Vanish revelation
Show the supposed receiving hand empty in a way that feels relaxed, not “ta-da.” Then let the other hand also look normal as quickly as the routine allows.
Phase 5. Continue, do not freeze
One of the most common mistakes is stopping dead after the vanish. Keep breathing. Keep talking if this is live. Move into the next beat naturally. A hard stop tells viewers where to inspect.
Angles matter more than method online
A move that is only good from one perfect front angle is not camera-proof. It is camera-lucky.
Phones drift. Friends film from below. Someone crops in. Someone zooms. The lens may be wider than you expect. Build for slop.
How to test your angle safety
Set your phone in three positions. Straight on. Slightly low and to your weak side. Too close by about 20 percent. If the vanish survives all three, you are getting somewhere.
This is also why practical workers often prefer methods that are a bit less flashy but a lot more stable. The clip may look less “viral” at first glance, but it holds up when people inspect it.
If you are also working on utility vanishes that need to play in tougher conditions, this piece on From Viral ‘Coin Melt’ Clips To Real Workers: How To Build A One‑Hand Pocket Vanish You Can Use Surrounded is worth your time. It speaks to the same real-world shift, from pretty clip to usable tool.
What to stop doing right now
Stop “proving” too much
The more you insist a hand is empty, the less empty it feels. Show, do not plead.
Stop using edits to rescue weak sleights
Viewers are much better at spotting rhythm breaks than they were a few years ago. Even if they cannot name the edit, they feel the cheat.
Stop copying a front-facing tutorial look
A vanish that fools from one creator-camera setup may not survive your room, your lens, your hand size, or your pacing.
Stop treating comments like noise
The audience tells you exactly where your handling feels fake. You do not have to agree with every comment. But if fifty people all say, “It is in the other hand,” your structure is probably signaling that.
The best rehearsal drill for camera-proof vanishes
Here is a simple drill that works.
Record ten reps in one take
No cherry-picking. Do the vanish ten times from the same angle.
Watch at full speed first
If it already looks tense, slow-mo will be brutal.
Watch at half speed next
Look for the exact frame where your hand shape changes, the object path bends, or your eye line gives away the method.
Watch with the sound off
Sound can hide awkward rhythm. Silent video tells the truth.
Then show one clip to a non-magician
Do not ask, “Did you see the move?” Ask, “Which hand felt suspicious?” That question gets better answers.
Why “real worker” thinking beats viral thinking
Viral clips often chase the strongest single second. Real workers chase the strongest full sequence. That difference matters.
A vanish that survives frame-by-frame scrutiny is usually less about one impossible image and more about a chain of ordinary-looking moments with no obvious weak link. It is less sexy. It is also much more powerful.
That is the same lesson many magicians learn when they move from clip magic to practical material. The goal is not to make people say, “That happened fast.” The goal is to make them say, “I checked everything and still cannot place the object.”
At a Glance: Comparison
| Feature/Aspect | Details | Verdict |
|---|---|---|
| Fast visual vanish | Can look strong at first glance, but often exposes finger movement or transfer timing in replay. | Good for flash. Weak for scrutiny. |
| Structured “real worker” vanish | Uses clean displays, justified actions, and minimal secret content in the visible moment. | Best choice for repeat viewing and bad angles. |
| Editing-assisted vanish | May fool casual viewers, but rhythm breaks and jumpy continuity get noticed quickly. | Risky if you want trust and long-term credibility. |
Conclusion
Social platforms have changed the test, not the goal. People still want wonder. They just bring a pause button now. If you build your vanish like a real worker, with honest-looking displays, fewer suspicious frames, and endings that stay clean from rough angles, your magic stops depending on mercy from the camera. That is the real value here. Creators across TikTok, Instagram and YouTube are posting ultra close up hand magic every hour, and audiences have learned to “debunk” sleights by default with pause and slow-mo. A deep dive on camera proof vanish design gives working magicians and serious hobbyists something they can actually deploy tonight: a real world handling that survives being filmed from bad angles, replayed ten times, and argued over in the comments, so the mystery, and your reputation, actually grows instead of collapsing the moment a phone appears.